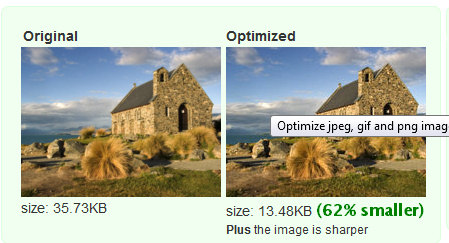
Generally speaking, most library staff I work with understand that, when you take an image off a digital camera, it’s huge. It’s easy to see that it’s huge; often, the photo may take up more than your monitor. So, most library staff understand that those digital images have to be resized to fit on their libraries’ websites. However, many non-techs don’t always know that you have to also optimize those images. This means not just making them visually smaller, but actually taking out useless pixels that can’t be seen by the human eye. This means that the image will usually download significantly faster–a boon not just for the inevitable dial-up user, but even for the broadband one. 1 in 4 people abandon a site that takes more than four seconds to load. So, it’s in your library’s best interests to get those images as small as possible–not just visually, but the file size needs to be dropped as well.
Many professional graphics programs have built-in optimization tools, but for most casual web editing staff, I recommend an online tool called Web Resizer. It’s free, and you don’t even have to register to use it. You just upload your image (it can be up to 5 MB), then let it do the work. It shows you the original and the new, optimized image; most times, you won’t be able to even notice a difference. You just download the new one and you’re done.
What does this mean to me, Laura?
- Getting all of the images on your website optimized might be tedious, but it’s very, very important. There are still dial-up users, even now. Additionally, broadband users have limited tolerance for slow sites.
- Web Resizer also offers some additional options for tweaking your image. It can also crop, sharpen, resize, rotate, add a border, adjust saturation, brightness and contrast. All free.

I’m fond of Web Resizer, but there are other tools that do image optimization. Any other favorites? Post them in the comments!
There are 3 comments
Please, please, PLEASE note! It’s very important to keep the original file straight from the camera around as well. While visually the image looks better after processing, after you reprocess an image a few times, it’s going to look pretty bad. You might want to crop out a different section in more detail. And heaven help us should you try to use a web-optimized image for print purposes! When going to make changes in what you have – please always start once again at the *ORIGINAL* file you downloaded from the camera! And memory cards are big and cheap – I strongly suggest setting the camera for the highest resolution and highest quality settings. You can take details out of a picture easily enough – it’s far harder to put them back in, especially when they were never there to start with.
(This comment is from JD Thomas –for some reason, the spam filter wasn’t playing nice today!)
Sites like Web Resizer are great for occasional use, but for anyone who needs to do this on a regular basis should check out GIMP and especially the built in “Save for Web” feature that helps you easily save out web ready images quickly and easily.
Because GIMP does not cost anything a library or individual can afford it even if pro-tools like Photoshop are out of reach.
IrfanView! It’s free, easy to figure out and has lots of options. I’ve used it for years myself and we’ve put it on the public computers here as well. http://www.irfanview.com/
And Tara makes a good point about keeping the original file along with the optimized version.
Comments are closed.